
[네트워크] 포티게이트(Fortigate) 방화벽 설정 방법 기본

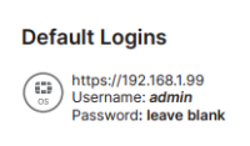
- 초기 장비 접속:
- 컨피그 입력 후:
end 저장하고 나오기
abort 저장 안하고 나오기
- MGMT 인터페이스 설정:
FortiGate # show system interface <현재 IP 설정 상태 확인>
FortiGate # config system inter
FortiGate (interface) # edit mgmt
FortiGate (mgmt) # set ip 192.168.100.1/24 <노트북과 연결하여 사용할 IP 설정>
FortiGate (mgmt) # set allowaccess https ping ssh <방화벽 장비에 접근 허용>
FortiGate (mgmt) # end
- wan1 인터페이스 설정:
FortiGate # config system interface
FortiGate (interface) # edit wan1 <인터넷 회선 연결할 포트>
FortiGate (wan1) # set mode <회선 포트의 IP 형식 설정>
static Static setting.
dhcp External DHCP client mode.
pppoe External PPPoE mode.
FortiGate (wan1) # set mode static <Static으로 사용>
FortiGate (wan1) # set ip 192.168.10.123/24 <공인 IP>
FortiGate (wan1) # set allowaccess https ping ssh <장비에 접근 허용>
FortiGate (wan1) # end
- 라우팅 설정:
config router static
edit [숫자]
set status [ enable | disable]
set device [인터페이스 이름 또는 터널 인터페이스]
set dst [목적지 네트워크/netmask]
set distance [숫자]
set gateway [게이트웨이 주소]
end
- 계정 설정(접근제어):
FortiGate# config system admin
FortiGate(admin) # show
config system admin
edit "admin"
set trusthost1 192.168.50.0 255.255.255.0
set trusthost2 192.168.10.0 255.255.255.0
set accprofile "super_admin"
set vdom "root"
next
end
- 공장초기화:
#execute factoryreset
Y
STAT에 불이 꺼졌다가 다시 켜지면 정상적으로 공장초기화가 진행된 것으로 예상할 수 있다.
- GUI 설정 변경 시 CLI에서 명령어 출력 디버깅:
diagnose debug cli 7
diagnose debug enable
- 점검 명령어:
# get system performance status
CPU, Memory, 트래픽, 내용 확인
# get system interface physical
보안장비 인터페이스 상태 확인
# get vpn ipsec tunnel summary
VPN 터널 상태 확인
# get system ha status
# diagnose sys ha status
HA 이중화 상태 확인
# diagnose netlink device list
interface 별 패킷 사용량, error 카운트 등 확인
# diagnose sniffer packet
[interface_name] '조건' [1~5] 조건에 대해서 패킷덤프
# show system interface
포트명 개별 인터페이스 IP 및 접속권한 확인 명령어
# get system interface
전체 인터페이스 상태값 확인
# get system interface physical
전체 인터페이스 상태값 확인
# diagnose sys logdisk usage
로그디스크 사용량 확인
# get system arp
arp 확인
# diagnose user device list | grep -B 5 -A 5 00:11:22:AA
특정 MAC 앞 뒤로 5줄 확인
# get hardware nic [포트이름]
MAC-Address 확인
# get hardware status
장비 하드웨어 정보확인 명령어
# execute factoryreset
장비 초기화 명령어
# execute shutdown
장비 shutdown 명령어
# execute reboot
장비 리부팅 명령어
# execute telnet x.x.x.x
telnet 접속 명령어
# execute ssh username@x.x.x.x
ssh 접속 명령어
# execute traceroute x.x.x.x
trace명령어
# execute log display
CLI 상에서 로그확인 명령어
# show full-configuration
컨피그 확인
# show full-configuration | grep vdom -f
vdom이 포함된 명령어 찾기
# diagnose sys waninfo ipify
공인 IP 확인 (설정되있어야 가능)
- ping
# execute ping 192.168.100.1
ping 명령어
# execute ping-option source 192.168.100.1
source ping 명령어
# execute ping-option view-settings
ping 옵션 확인
# execute ping-option adaptive-ping enable
1초에 한번씩 빠르게 핑보내기 옵션
- HA
# execute ha manage [이중화 번호]
Master 장비에서 Slave 장비로 접속
# diagnose system ha reset-uptime
Master ship 변경
- DHCP
# execute dhcp lease-list
DHCP 할당 내역
# execute dhcp lease-clear all
dhcp 클리어
- session
# diagnose system session filter [조건]
조건에 대한 session filter 적용
# diagnose system session clear
*경고* filter 적용을 하지 않았을 시 전체 세션 clear가 되므로 filter 적용 후 clear 해야한다.
- Terminal length
CLI 줄 전체 보기
config system console
set output standard
end
CLI 줄 페이지 별로 보기
config system console
unset output
End
- 웹 필터 생성, 순서 변경 예시
edit url -> ex) edit *naver.com
set action allow -> ex)*naver.com 웹사이트 허용하기 allow는 허용, block은 차단
set type wildcard -> ex) naver.com 포함된 사이트 설정=*.naver.com 임
config webfilter urlfilter -> 웹 필터 접속
get -> 웹 필터 정책 확인
edit 1 -> 정책 여러개 중 선택하기
config entries -> 선택한 정책 수정 모드 들어가기
show -> show는 해당 정책에 있는 웹사이트 목록 전체보기
Move 111 after 222
(이동할 번호) (222앞에) or before (객체 밑에)
end로 저장
- grep 옵션 설명
Options:
-i 대•소문자 구분을 하지 않음
-n 출력하는 줄이 몇번째 줄인지 행번호 표시
-v 특정 문자열이 포함되지 않는 줄 표시
-f 해당 문자가 포함되는 fortinet config context 표시
-c 특정 문자열이 포함되는 라인수 출력
-A NUM 특정 문자열로 부터 NUM 이후 라인 출력
-B NUM 특정 문자열로 부터 NUM 이전 라인 출력
-C NUM 특정 문자열로 부터 NUM 이전, 이후의 라인 출력
- 패킷 덤프 예시
# Diagnose sniffer packet any "host 192.168.100.1" 4
- 192.168.100.1을 모든 포트에서 감지하고 싶을 때
# Diagnose sniffer packet wan1 "host 192.168.100.1" 4
- 192.168.100.1을 wan1에서 감지하고 싶을 때
# Diagnose sniffer packet wan2 "host 192.168.100.1 and icmp" 4
- 192.168.100.1을 wan2에서 감지하고 icmp를 감지하고 싶을 때
# Diagnose sniffer packet wan2 "host 192.168.100.1 and host 10.10.10.2" 4
- 192.168.100.1을 wan2에서 감지하고 192.168.100.1 , 10.10.10.2와 통신하는것만 잡고 싶을 때
# Dignose sniffer packet wan1 "host 192.168.100.1 or host 10.10.10.2" 4
- 192.168.100.1을 wan1에서 감지하고 192.168.100.1 , 10.10.10.2 둘중 아무거나 감지하고 싶을 때
# Dignose sniffer packet wan1 "host 192.168.100.1 or 10.10.10.2 and port 443 or icmp" 4
- 192.168.100.1을 wan1에서 감지하고 192.168.100.1, 10.10.10.2 둘중 아무거나 감지하고 port 443을 감지하고 ICMP도 감지
# Diagnose sniffer packet wan1 "net 10.10.10.0 255.255.255.0" 4
- 10.10.10.0/24 네트워크 대역을 모두 잡고 싶을 때


댓글